🧑💻 Flashing Process
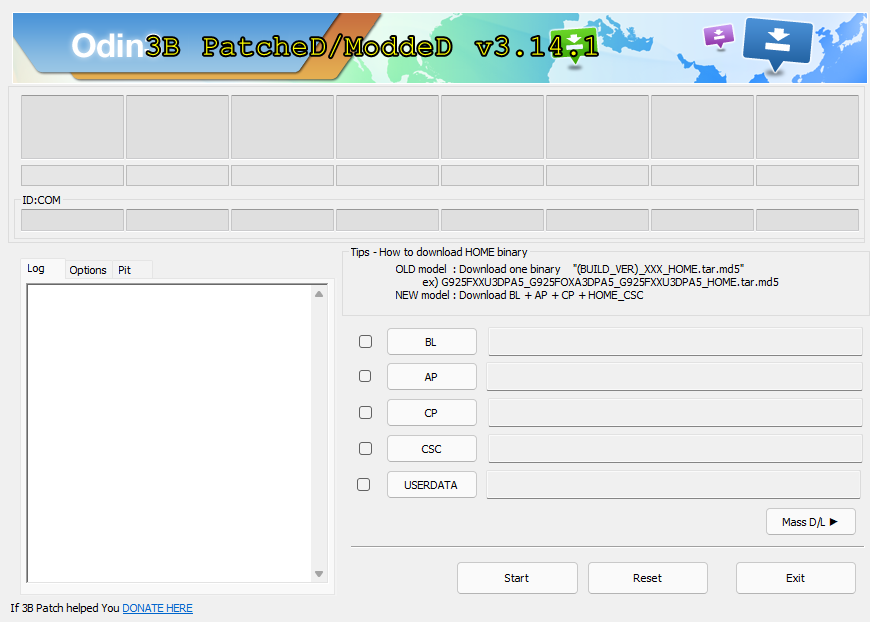
Once you have the files, you’re ready to flash the firmware! Open up Odin and you will be greeted with this page.
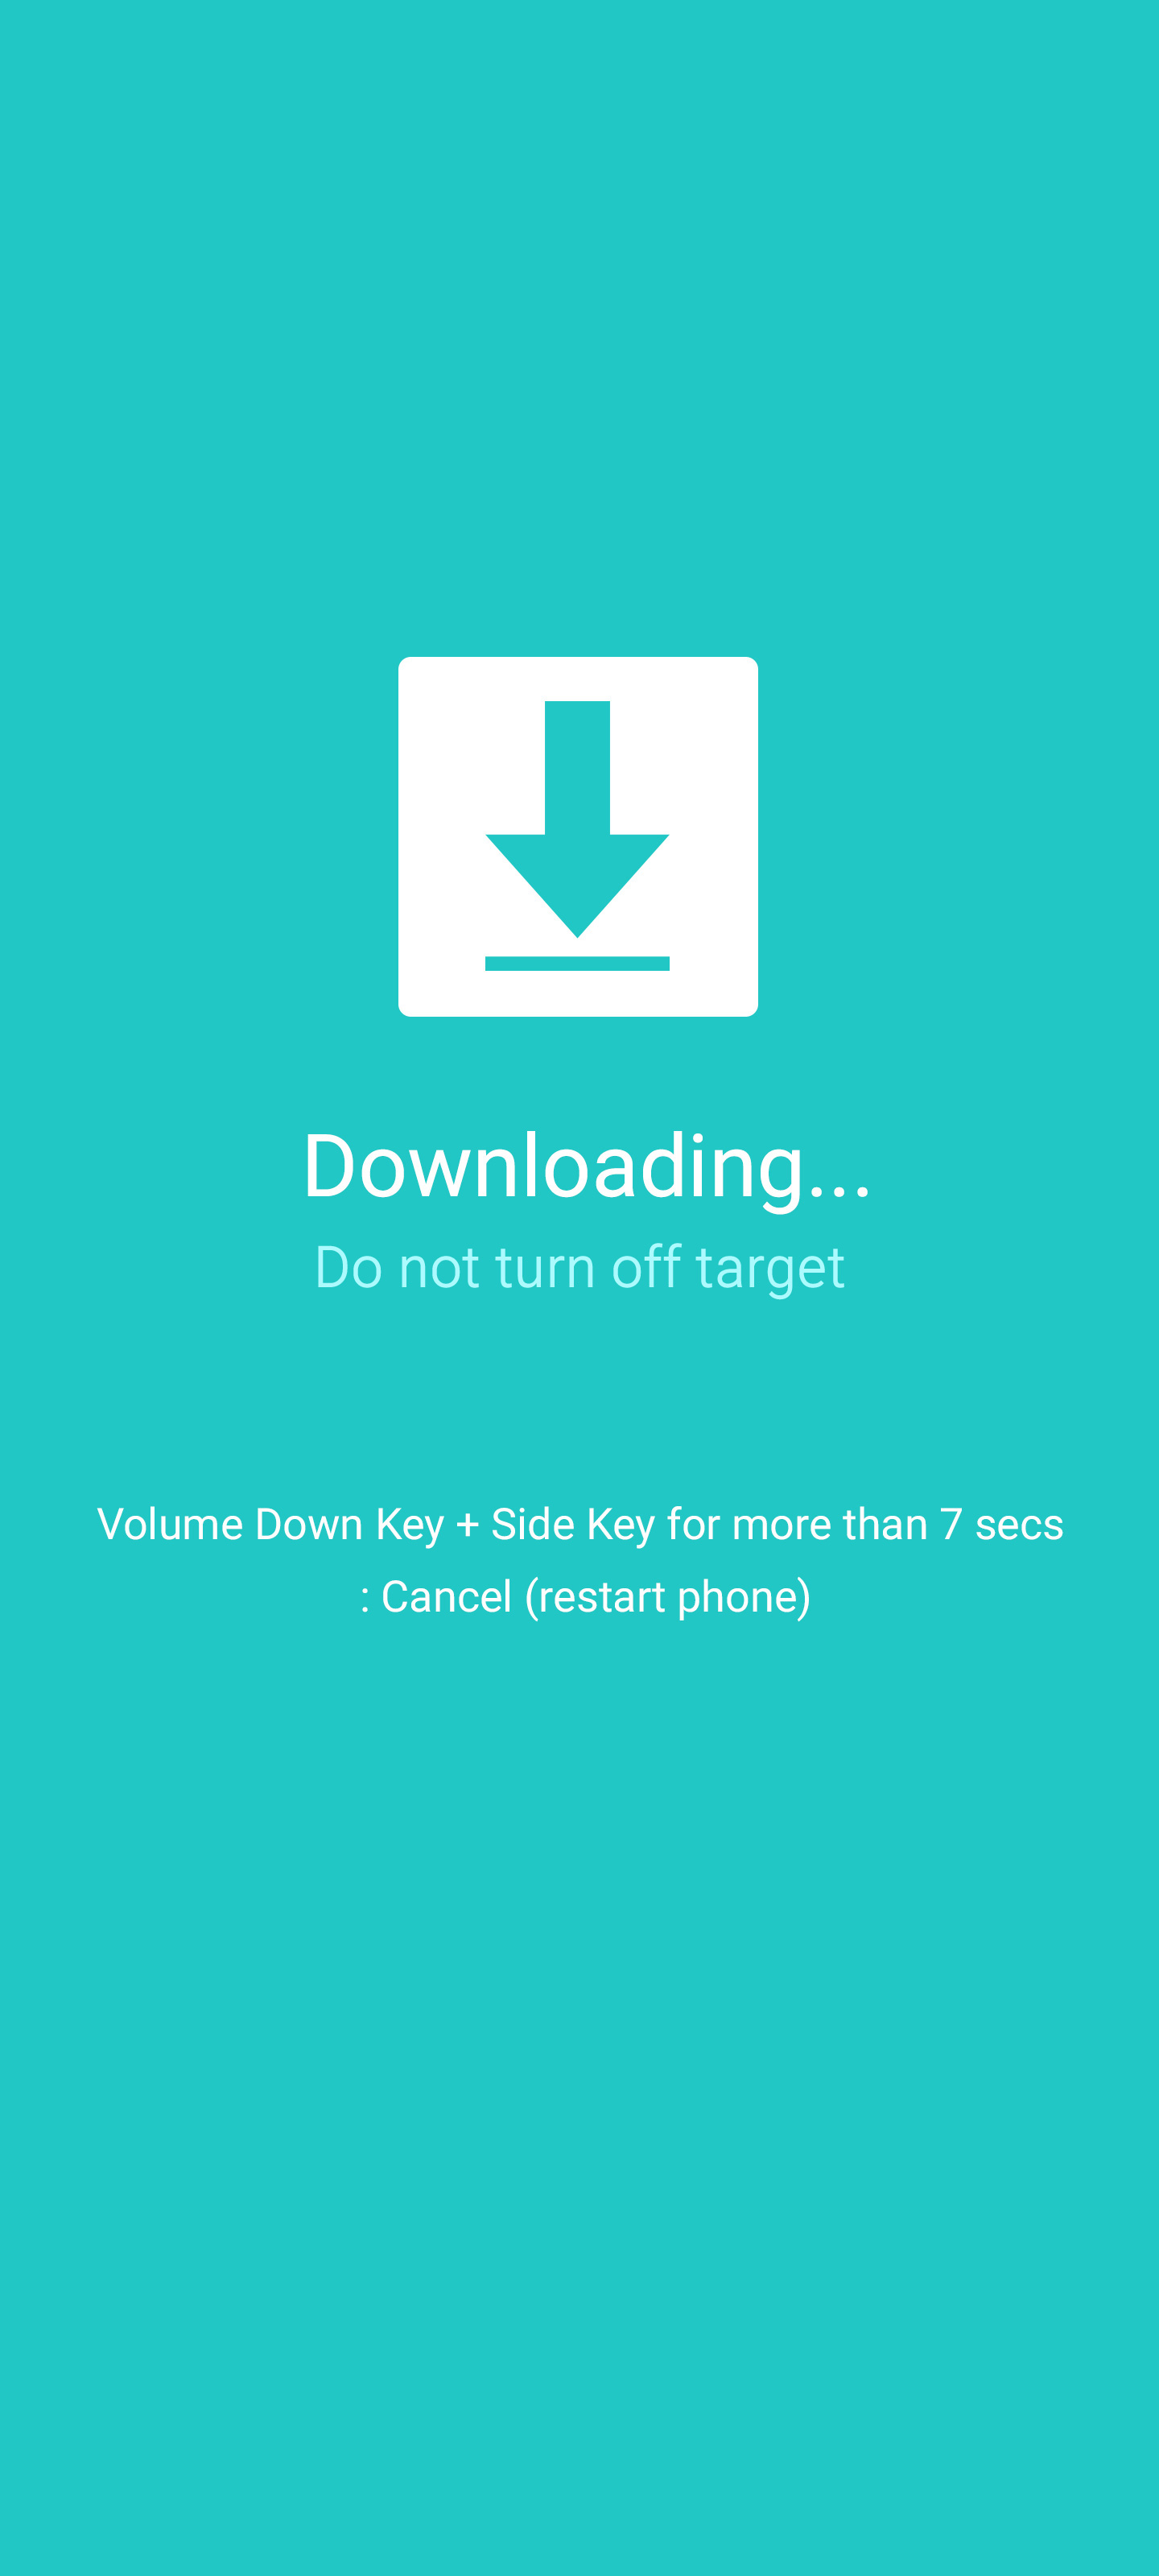
Then, you will need to put your phone in download mode. This may vary by model, but on the S20 (for example), you can enter download mode through powering off your phone, then by pressing and holding both volume buttons when it’s off. I recommend searching how to boot into download mode (e.g., Galaxy S10 download mode) if you have another device. Regardless, you should see this screen if you do it correctly (then press volume up to get to the second screen).
Now plug in your phone. Odin will recognize that a device has been connected and should show up on the screen. As shown above in the Odin screenshot, there are 5 boxes where you will place the firmware files you downloaded previously (BL, AP, CP, and CSC; USERDATA will not be used). Click on each name and select the corresponding file (e.g., BL file goes into the BL slot, CP file into CP slot, and so on). Your computer may hang when doing the AP file (it’s a big file), but be patient and let it continue. Now, regarding CSC, you will have two options. The CSC file will wipe your device, while the HOME_CSC file will keep all your data intact. You can choose whatever is best for you, but I recommend wiping and flashing a clean install (regardless, backup your data beforehand). Now that all your files are placed, click the “Start” button to begin flashing.
If the flashing is successful, you will get a “PASS!” at the end. If you get a FAIL, it could be for various reasons such as firmware incompatibility, missing USB drivers, and vice versa. I recommend looking at this for more detail.
And that’s it! If all went well, you should be running the most up to date firmware on your device. Note that this guide outlined how to flash the latest version firmware available.